Note: If you are using Internet Explorer you may get a warning that says --this file has been restricted from showing active content etc., etc., etc. Right click on the warning area and choose "Allow Blocked Content" and then choose yes when the next box opens up. If you don't you will not be able to see the photos properly when you click on them.
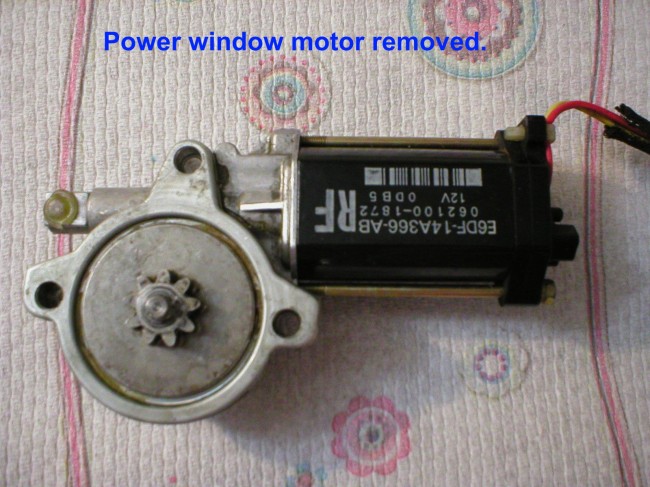
This window is the front passenger window but the others are similar. The drivers door has more switches and wires but is basically the same. One thing I need to point out is that each of these motors are the same but have different bolt patterns. So they only fit one door and are marked on the motor RF, LF, RR, LR.
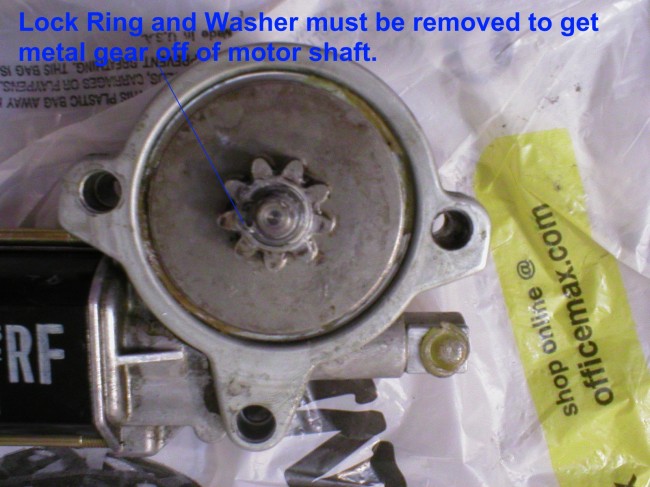
The lock ring has to be removed to get the metal gear off of the shaft. There is also a thin washer under the lock ring. There are special lock ring pliers to remove these with but I did not have any. I used some very small needle nose pliers to spread the ring and then got a very small screwdriver under the lock ring to remove it. Be careful because you can bend this lock ring beyond repair. And, it can shoot off into space as it clears the shaft and you might lose it.
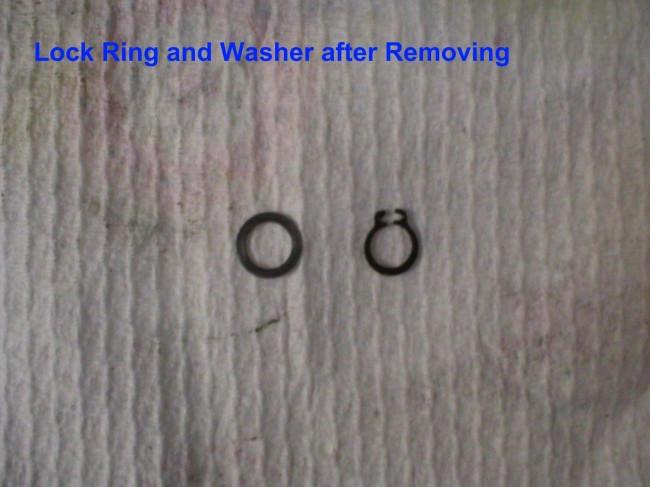
View of the lock ring and washer removed.

Front and rear view of the metal gear after removing it.
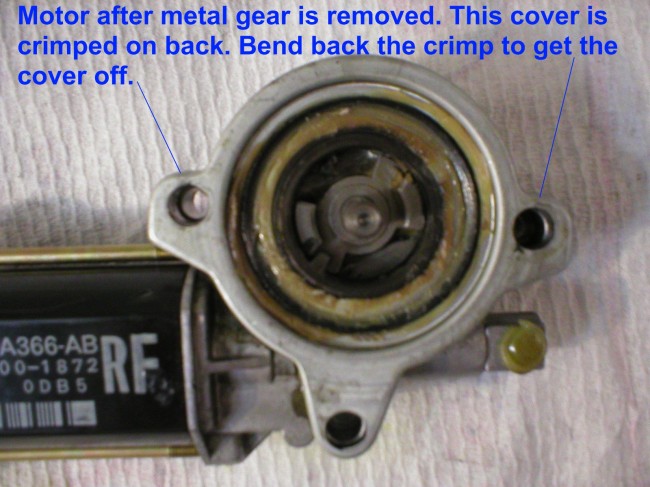
Now the cover has to be removed. It is crimped in a couple of places on the back. Use needle nose pliers and a screwdriver to bend the crimp back in order to get the cover off. Be careful pulling and prying the cover off. There is a kind of spring and spring holder pressed into the cover. If it comes out it is hard to get back in. The reason I know it is hard to get back in is that I did not notice it and pried the cover off popping the spring out :)
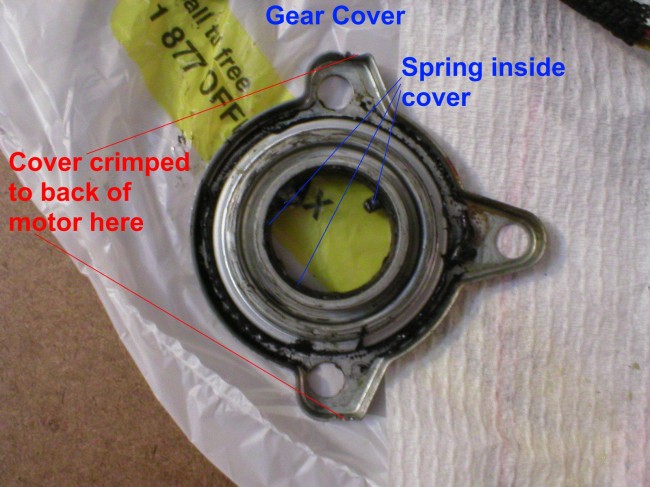
View of the cover removed showing the areas that it was crimped at.
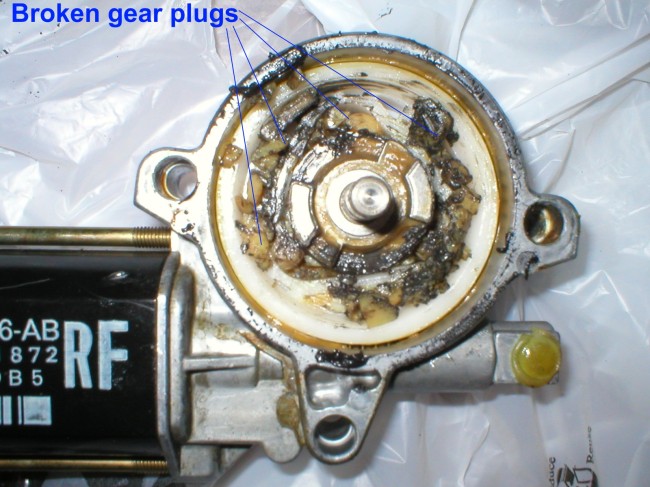
Now you can see all the broken gear plugs inside the gear. You can pull off the metal gear plug drive unit and then pull out the nylon gear and clean the debris out. There is a small o-ring near the top of the shaft so you might have to pull a little harder to go past it. There might be a kind of suction on the nylon gear because of grease so you might have to turn the motor upside down and tap it on something to loosen the gear. Watch out for a thin washer that is kind of bent that is underneath the gear. It is bent on purpose to act kind of like a spring.
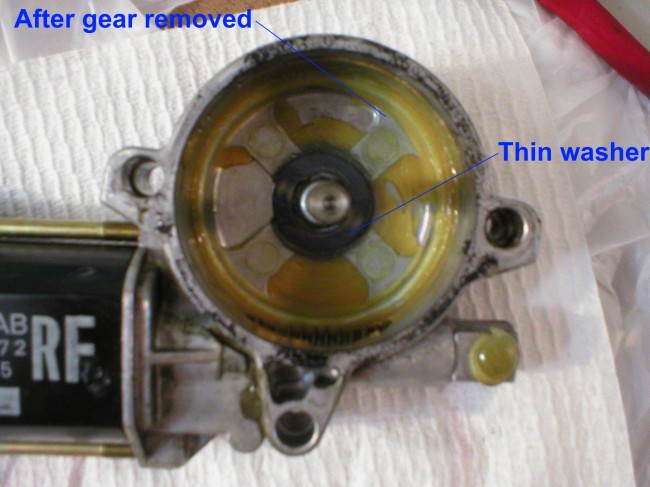
View of the motor with the gear and other parts removed. You can see the thin washer that was underneath the gear.
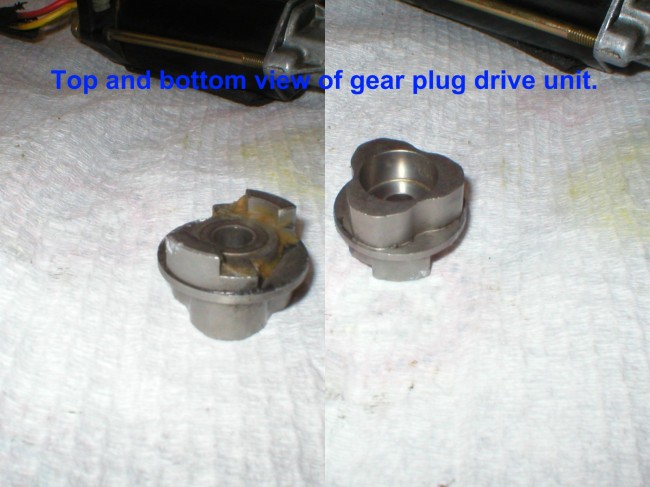
Top and bottom view of the gear plug drive unit.
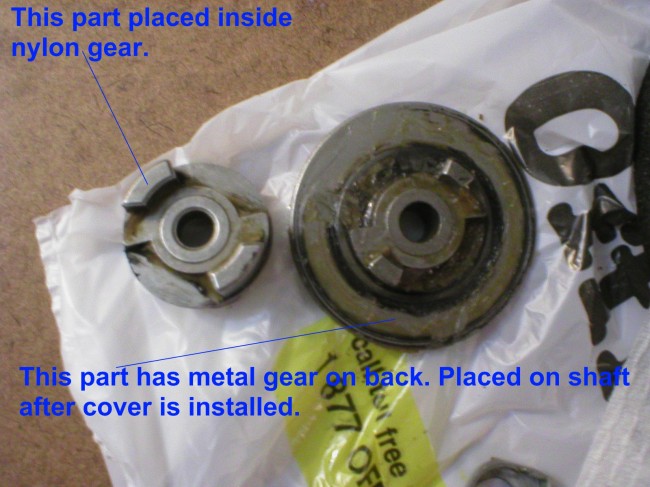
View of the metal gear and gear plug drive unit.
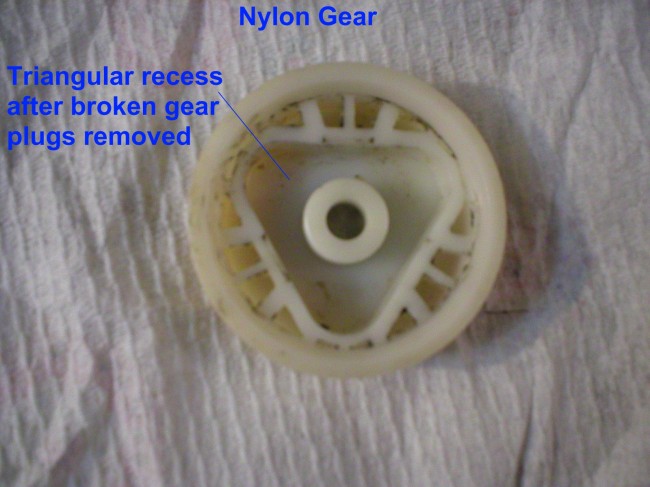
View of the nylon gear after cleaning.
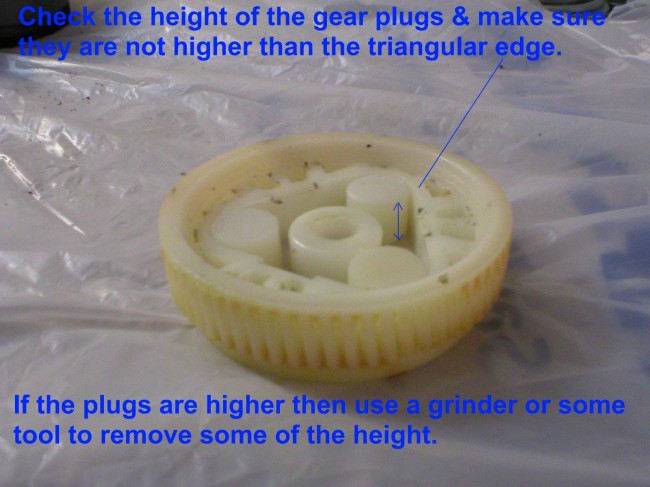
Sometimes these Gear Plugs are a little too tall and you would not notice it until you get everything back together and find that you can't get the lock ring inserted back into its groove. So you need to check them out before you put everything together. The photo shows where to check. If they need to be shorter you can do it on the side of a grinder or you can use a belt sander or something similar. I took a belt sander, turned it upside down, locked the switch and then went to work on the Gear Plugs. Be careful of pressing too hard and taking too much off or melting the plugs from the friction.
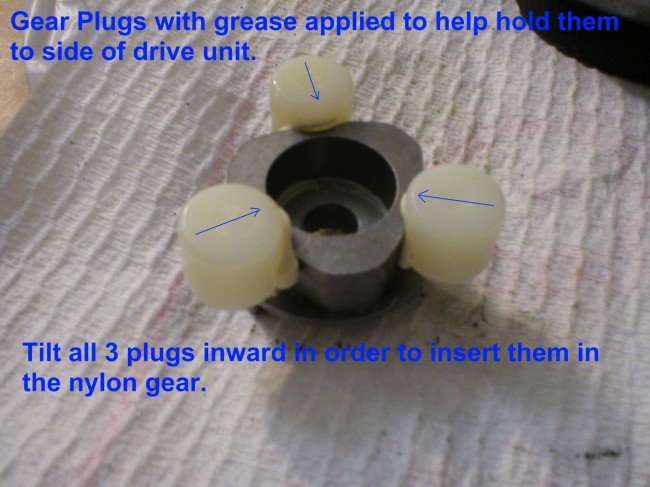
This could be one of the more aggravating parts of the repair. It looks like the Gear plugs are too big to fit between the drive unit and the nylon gear. But what you have to do is position them like in the photo with some grease or something sticky. I used lithium grease but a thicker kind might have worked better. Then you have to place them higher than the base of the drive unit and tilt them in. Then carefully insert everything in the nylon gear. After getting them started you might have to tap it all in with a hammer. If you place the right size socket on top of it, it helps distribute the force. That is what I had to do to get them in. I got that bit of advice off of another website on the Internet. One guy said he gave up on it and bought the gear with the parts already installed from Autozone.
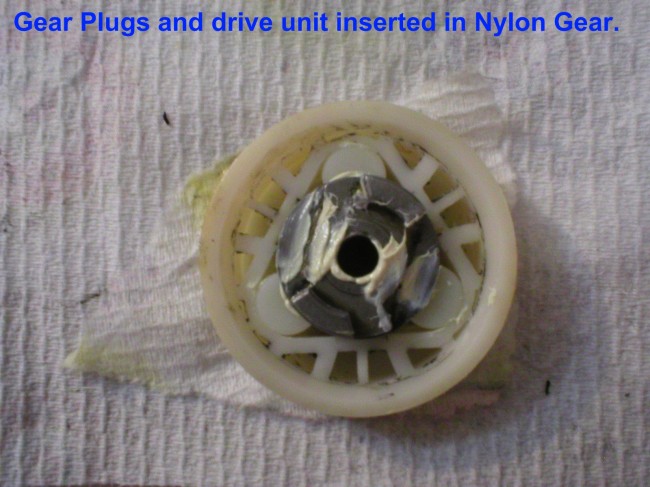
View of the nylon gear with the gear plugs inserted in it.

View of the motor with the nylon gear and gear plugs installed.
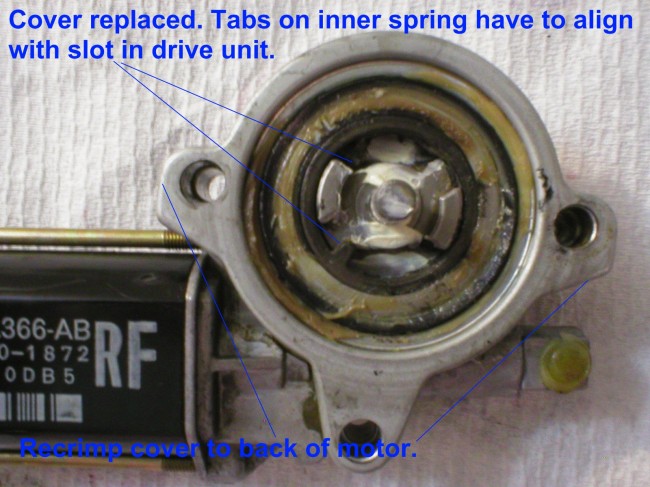
Now put the cover onto the motor. You need to make sure that you line up the nylon gear with the teeth on the motor drive so that the top of the drive unit aligns with the metal tabs on the spring. If you have a 12 volt battery or 12 volt battery charger you can put some wire in the connector and turn the gear to line it up. You will have to hold the cover over the bolt holes and make sure everything lines up. Or, you can take the nylon gear back out and turn it the needed amount then push it back in.
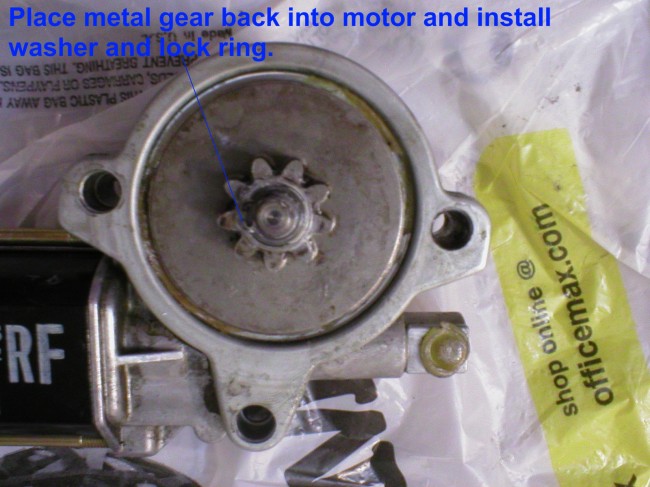
Now place the metal gear back into the motor and push it down. Remember the thin metal washer in the very bottom of the motor? It has a slight spring pressure so you may have to press the wide part of the metal gear down while you put the washer and lock ring back on. Then turn the motor over and re-crimp the cover to the motor with needle nose pliers or a screw driver and hammer.
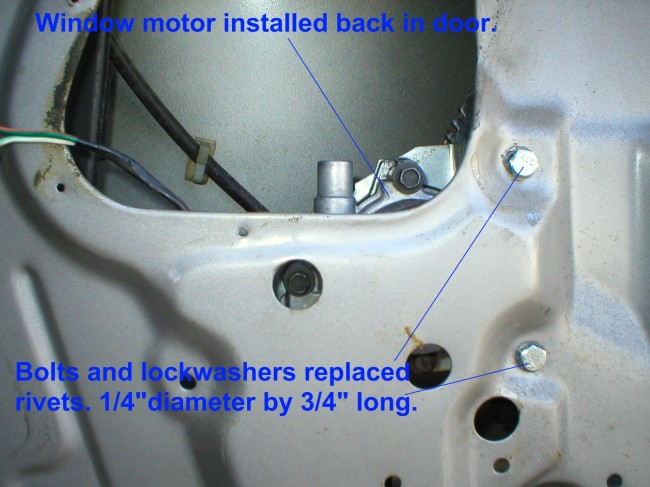
Now time to install the motor back in the door. I used 1/4" diameter by 3/4" long bolts, nuts, and lock washers. Any longer might touch the window regulator and interfere with it. Putting some of these bolts in and getting the lock washers attached to the back of them can be another aggravating job. Might need a magnet pickup or magnetized screw driver to fish them out of the door if you drop them. I know I had to. If you have access to a rivet tool you might be able to just redo it with rivets.