Note: If you are using Internet Explorer you may get a warning that says --this file has been restricted from showing active content etc., etc., etc. Right click on the warning area and choose "Allow Blocked Content" and then choose yes when the next box opens up. If you don't you will not be able to see the photos properly when you click on them.
If you are mechanically inclined and short on money right now this might help you out. According to the information I saw on the Internet it can cost $200.00--$500.00 to have one of these power window motors replaced. My car is so old that the cost of having four window motors replaced costs more than the value of my car. If it was an insurance claim in a wreck my car would be considered totaled. :)
My car is an older 1990 Ford Taurus. One day one of my power windows would not go back up so I helped it back up with my hand while running the power window motor which was not working very good. Within a few weeks all four windows quit working. I could hear them humming but they would not move. I didn't have the money to get them repaired so I had to do it myself. I am mechanically inclined but had never worked on power windows before. I started researching on the internet for some information and found a few websites and a few photos that helped me but I had to figure out the rest on my own with some help from an auto manual. I decided to take photos along the way and put this information on the net to help other people in the spirit of the free internet and free information.
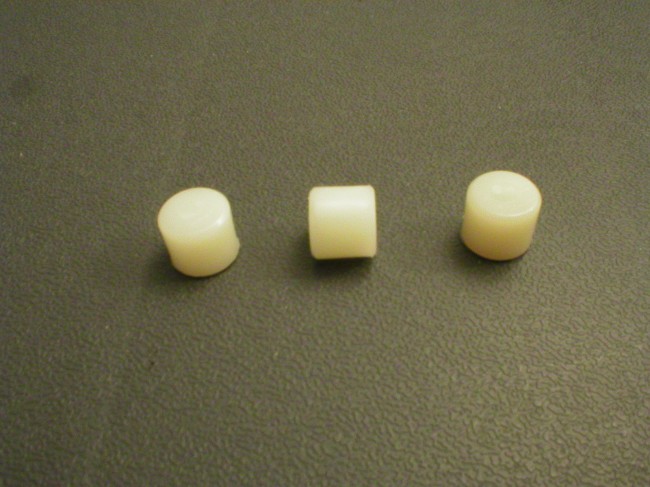
There are many things that can go wrong in a power window. There are the window switches, wiring, relays, the window regulator, the motor and small parts in the motor. But in my case it was these small parts in the motor. What happens to these motors most of the time is that they are still working but there are small parts called gear plugs -- some people call them torque pins --- and these small plastic parts deteriorate and fail.
They can be purchased at Auto Zone, Advance Auto Parts and other automotive parts stores. The whole gear that contains these small parts can also be purchased as a unit and be replaced in the motor. You can remove the motor from the door, take it apart and replace these gear plugs or the entire gear unit containing these gears plugs. Or, you can buy the complete motor which is the easiest way to do it but more expensive. The price of one of these motors averages $70.00 or more. The gear unit containing the gear plugs is around $20.00. The small gear plugs (there are 3 plugs in each motor and 3 plugs in each package) cost around $8.00.
The repairs I performed on these power windows are very similar on other Ford vehicles. According to Auto Zone the same motors fit the 1986 to 1995 Ford Taurus and many other Ford vehicles. The basics of these repairs are similar on other makes of vehicles although I am not sure if all contain the gear plugs.
I repaired one motor with gear plugs I purchased at Auto Zone but then found on the Internet a company that sells them for $1.57 and mailed them to me by U. S. Postal Service for .59 cents. I could hardly believe it in this day and age of Ebay and other companies shipping even small items for a high price. Their website is National Automotive Lines, Inc. You have to call their Toll Free number 1-800-428-4300 and order these parts (they call them torque pins) over the phone but the customer rep told me that they were going to update their website so people can place orders there. Okay ...... on to the repairs.
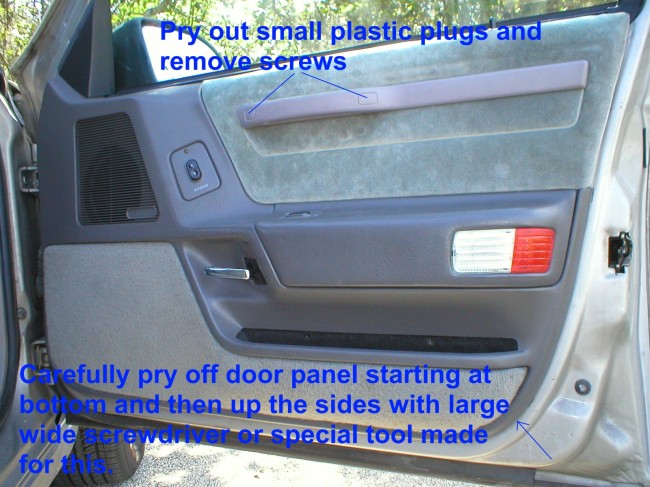
This window is the front passenger window but the others are similar. The drivers door has more switches and wires but is basically the same. Start by removing any screws that are holding the door panel on. Also remove the door handle. One thing I need to point out is that each of these motors are the same but have different bolt patterns. So they only fit one door and are marked on the motor RF, LF, RR, LR.
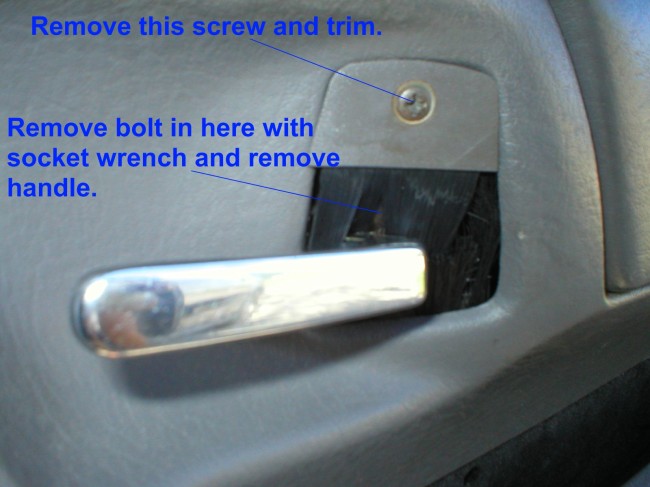
Take off the door handle by removing the bolt holding it on. Look at the photo to see how to do it. There are also other screws holding various trim and parts of the door panel on. Look the door panel over carefully to find other screws as different model vehicles may have different location of screws.
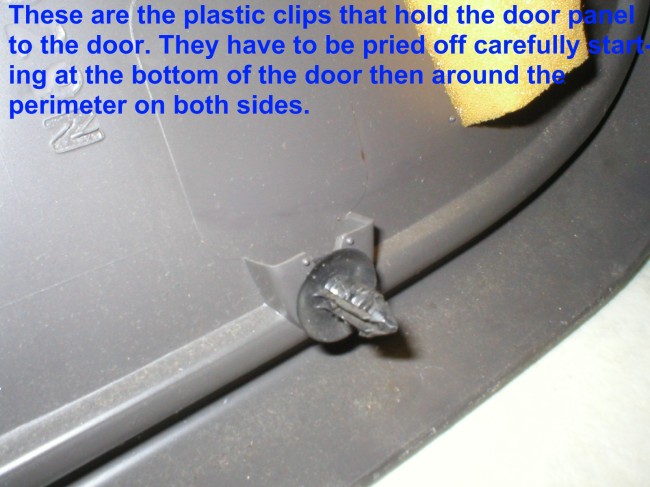
When all screws and parts holding on the door panel are removed the door panel has to be pried off. Start at the bottom and work around the perimeter. I used a large wide blade screwdriver but there is a special tool that can be purchased to do this.
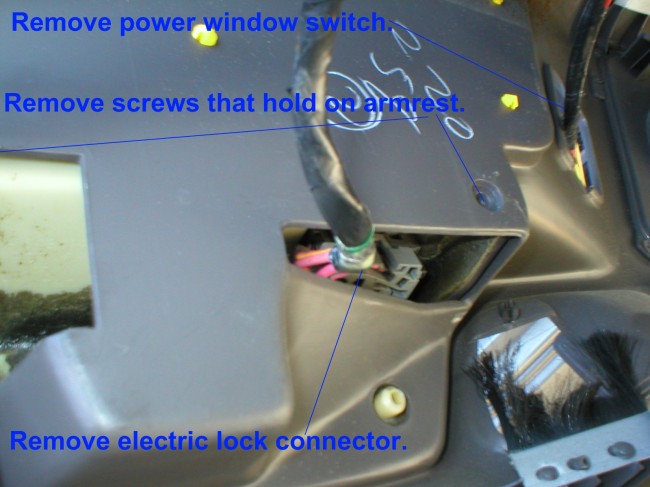
After the door panel is off then the armrest has to be removed in order to get the electrical connection to the power locks off.
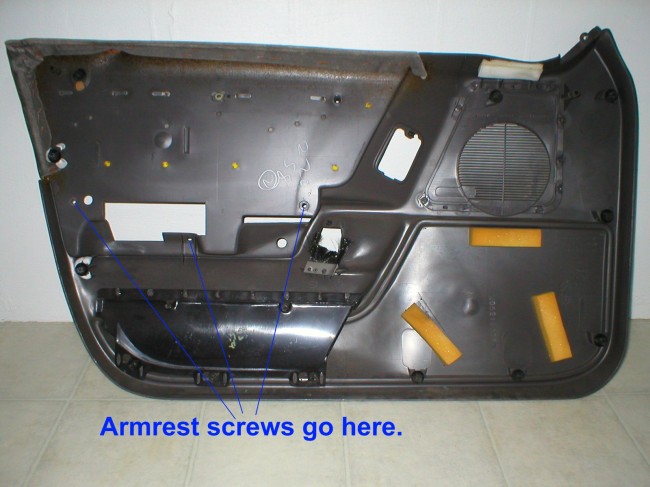
Location of screws that hold the armrest on.
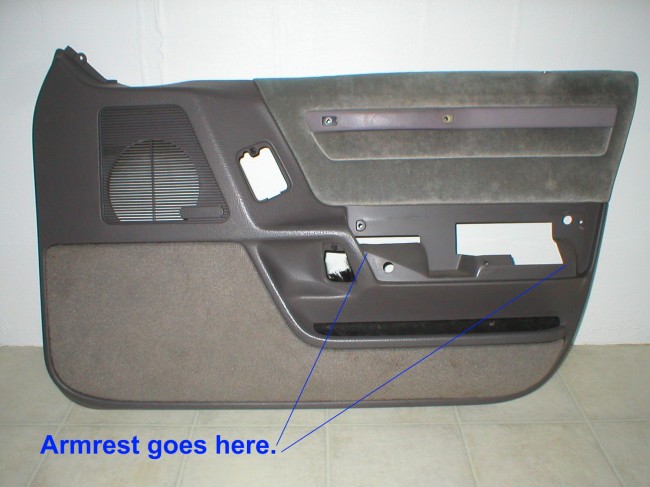
View of the door panel showing where the armrest is located.
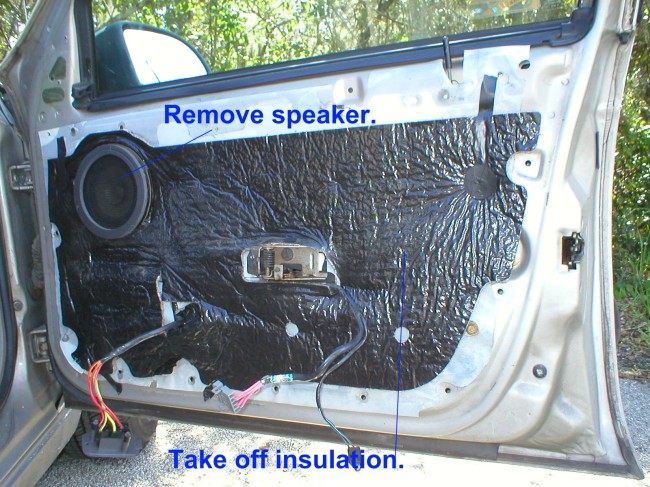
The speaker and insulation has to be removed. The power window motor is located beneath the speaker compartment.
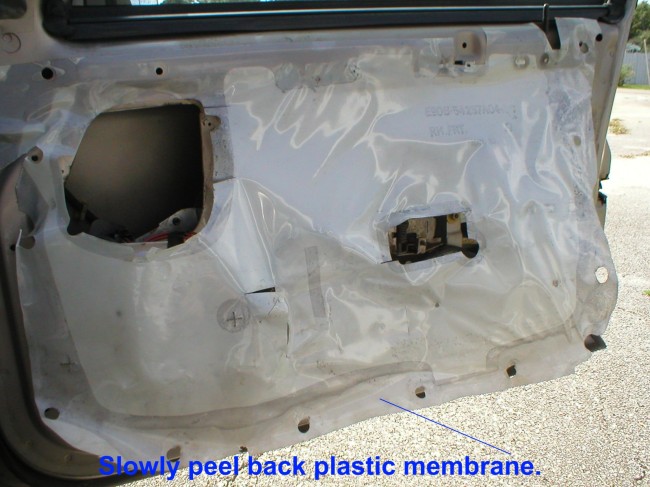
This plastic membrane which is a moisture barrier is glued on. Peel it off slowly so you don't tear it, starting at the bottom. You do not have to take it all the way off. You can leave the top part attached to keep it lined up so you can re-attach it later more easily. Just fold it up and use some tape to hold it to the top of the door to get it out of the way.
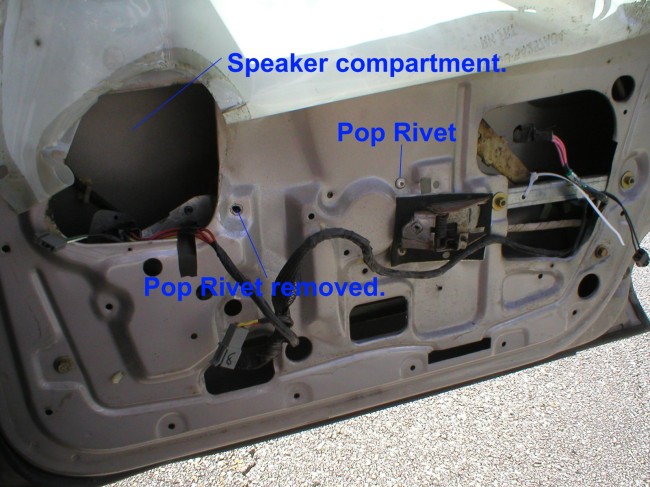
Now you can see the pop rivets that hold on the window regulator. On my car two of the rivets have to be removed in order to push the regulator and its gear back slightly to make room for the motor to be removed. Only the two rivets close to the motor have to be removed. On some vehicles it might not be necessary to do this.
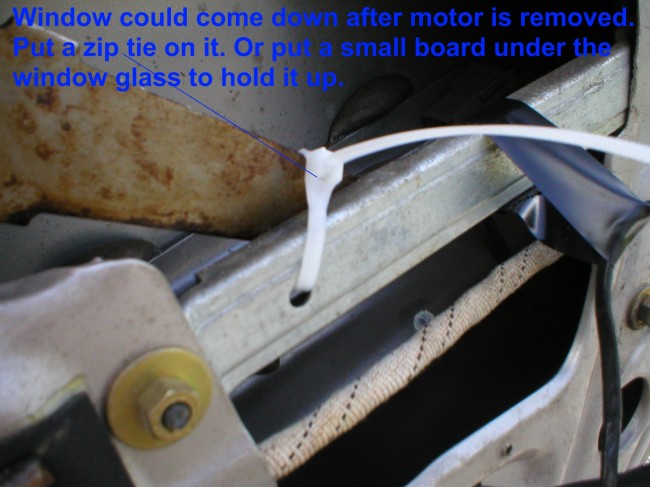
Before you remove the motor use a zip tie, a board or some other object under the window to hold it all the way up so it does not fall down inside the door.
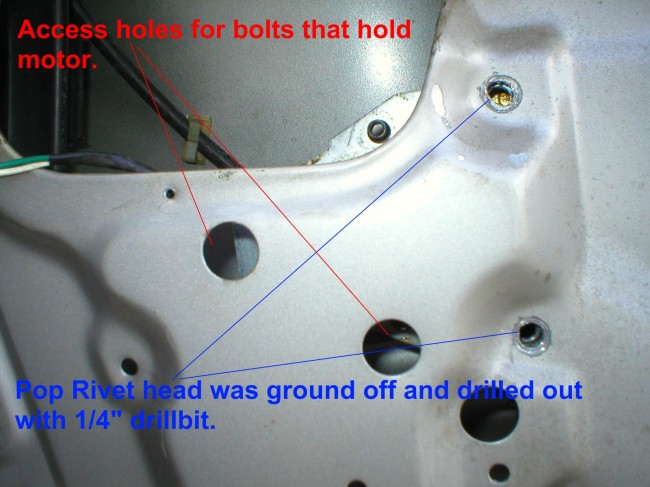
There are several pop rivets that hold the regulator to the door. The two near the motor have to be removed so that the motor can be removed from the regulator. The regulator has to be slightly pushed back for the motor to come out and clear the door. I used a small grinder to grind the heads off of the rivets and then drilled them out with a 1/4" drillbit. If you have sharp drillbits then you could probably drill through the center with a smaller drill bit and then drill again to get the remaining material out with the larger 1/4" drillbit.
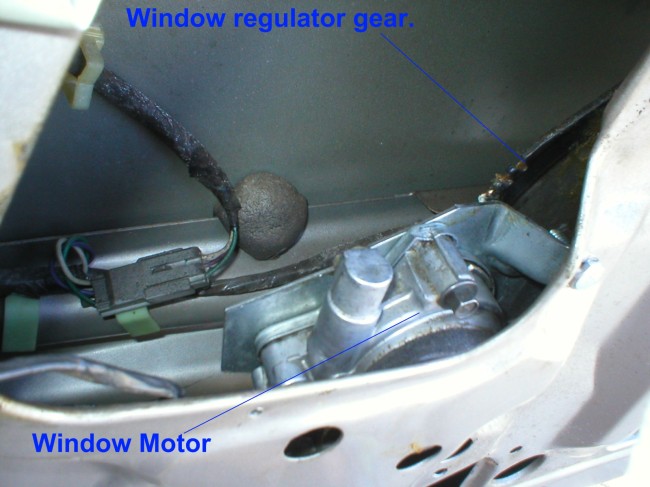
A view of the motor still in the door.
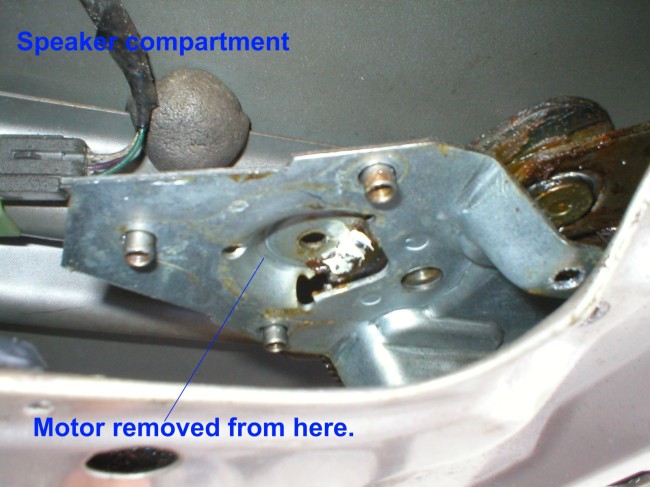
This view shows the door with the motor removed. In Part Two we get into replacing the gear plugs in the motor.